How to Install Zal Pro On VM?
First of all, download the Zal Pro VM OVA file here. After download the VM OVA file, follow these below steps one by one.

You have to install Oracle VirtualBox. After the installation, go to the top left sidebar & click on File menu & select Import Appliance from the dropdown list.
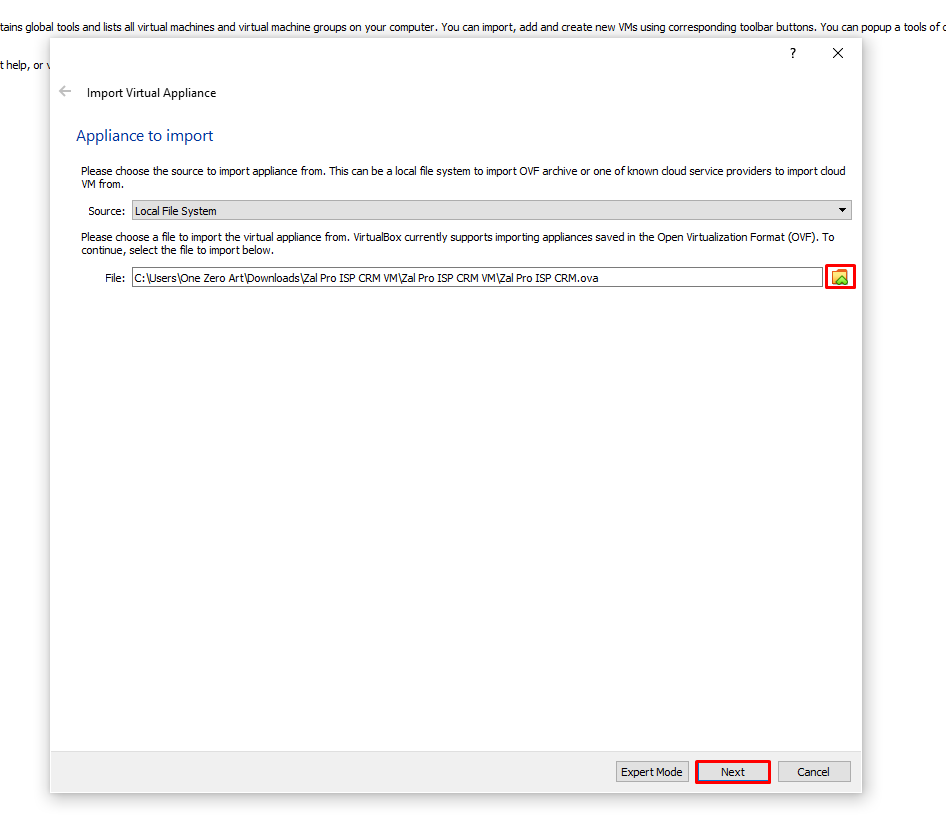
A new pop-up window will open Import Virtual Appliance. On this window you need to select the "Zal Pro VM Copy File" and hit the import button at the bottom right corner.
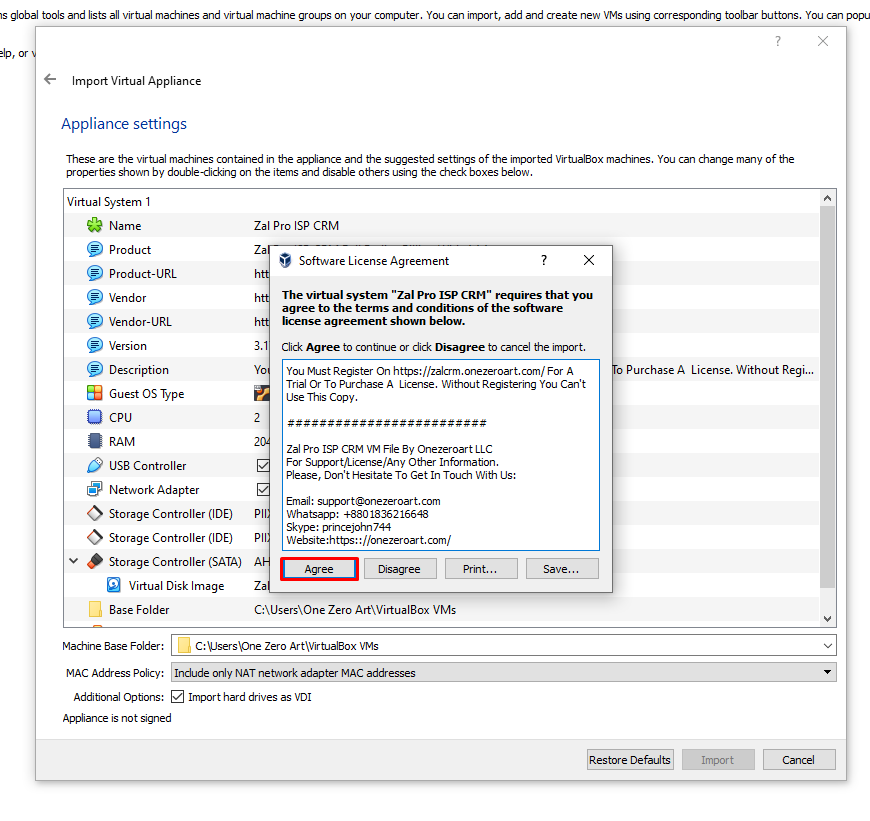
On this stage another window will open and you have to select "Agree" on the terms and licensing agreement. Also, you need to select "Generate New Mac Address For All Network Adapters" from "Mac Address Policy" List. To proceed hit "Import" button.

After the successful importing, you may face a error message. This error messaging will be shown becasue of network adapters are not selected properly. So to fix this issue, you need to go to settings page and set your PC network adapters properly on Zal Pro VM.
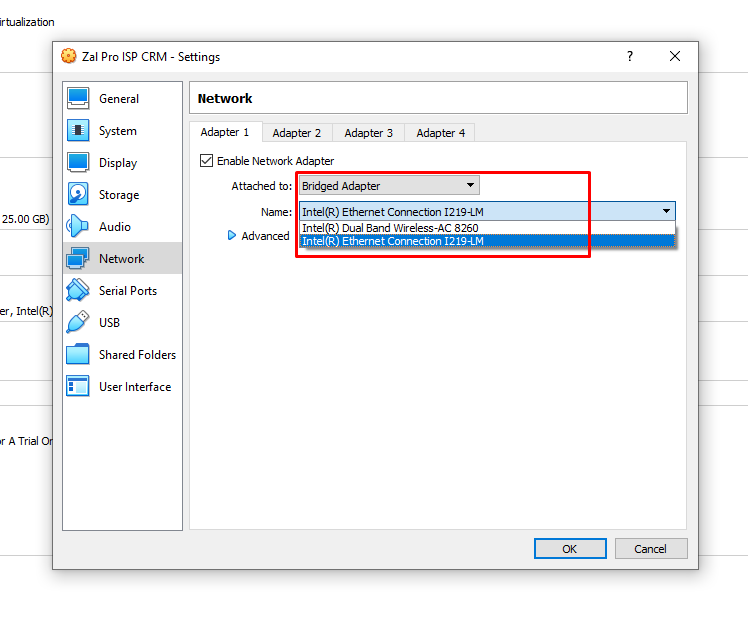
When settings panel open select "Network" option from left sidebar and enable 1st network adapter. At 1st network adapter set bridge networking/other option so that your Zal Pro VM can lend a DHCP IP address.
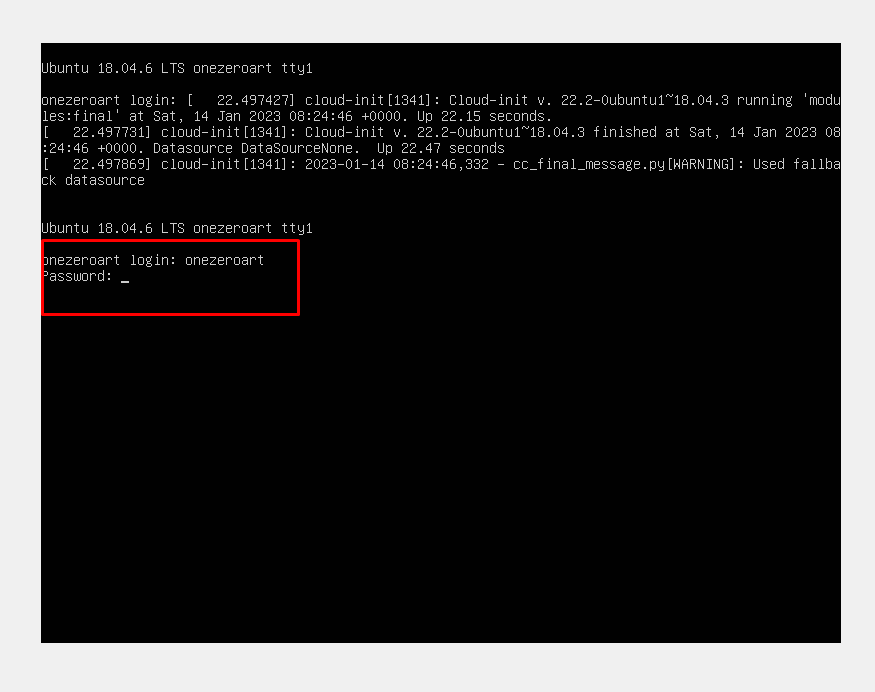
After networking setup done successfully, you can login into your VM instance by starting the VM from top menu. Default login credentials are username:onezeroart & password:123456
After successfully logged in into the VM instance. Get the IP address of the VM by typing "ip address" command on the command line. Use that IP address on your Host computer to browse Zal Pro web interface and try to login with default Zal Pro web interface credentials username:admin & password:123456