Policy
Policy -> Add New Policy
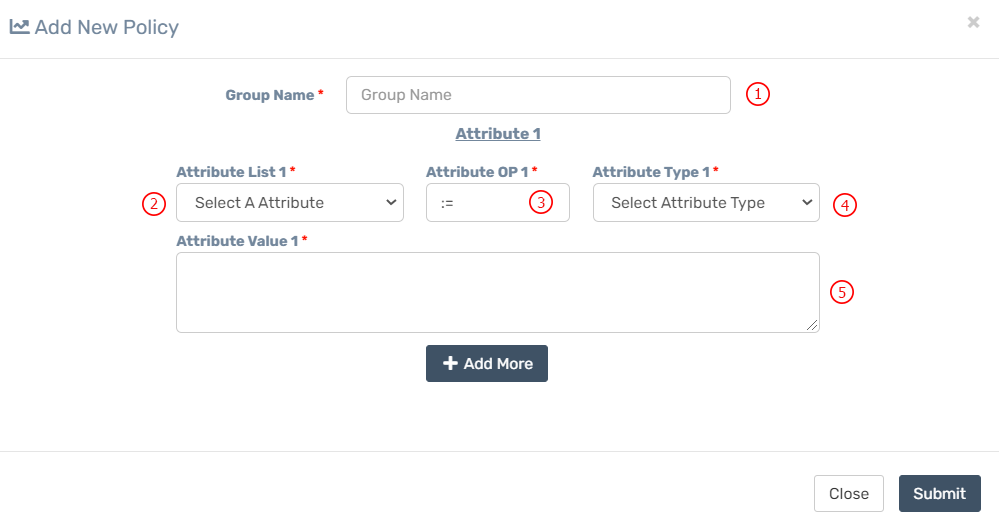
| Number | Attribute | Description |
|---|---|---|
| 1 | Group Name | Insert a name here for your policy. This name will be used later in many places in system. Example: 100mb_office or 10mb_student |
| 2 | Attribute | Select attribute from dropdown list. |
| 3 | Attribute OP | Insert attribute OP, most of the time which is :=, if you don't know what to put in there just :=. |
| 4 | Attribute Type | Select attribute type, most of the time you need to set Reply, attribute reply means radius will send these attribute and its values to mikrotik and Check means radius will check these attributes and its values before user authentication when mikrotik or nas sends those attributes or values from nas to radius. |
| 5 | Attribute Value | Insert value of attribute, radius will sends these value to nas or nas will send these values to radius. |
Mikrotik-Rate-Limit Official Example
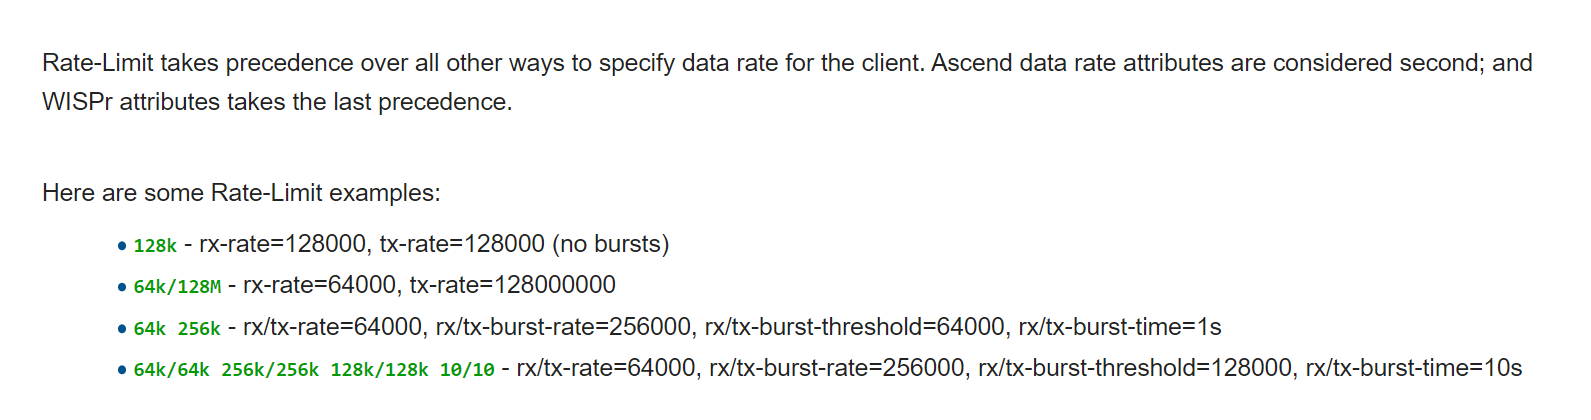
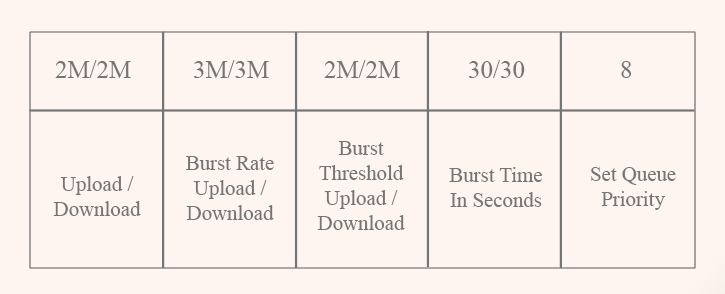
- If you want to generate simple queue in Mikrotik then select Mikrotik-Rate-Limit form attribute dropdown list. If you set Mikrotik-Rate-Limit then Zal Pro will reply or sends this attribute to Mikroitk and Mikroitk will set Simple Queue. So it will override all of your queue in Mikroitk. If you do not want to create Simple Queue in Mikroitk then do not set Mikroitk-Rate-Limit, you need to send an empty attribute value as Reply-Message or at least set any valid reply attribute in the policy. Keep in mind you must set both reply and check attribute in every policy, otherwise policy will not be visible in add new package page.
- Zal Pro supports most of the router attributes, follow router official website for radius attributes support, if you can set any attributes properly then Zal Pro will reply or check those attributes during user access request. Default attributes are Mikroitk attributes. Read Mikroitk official page here for Mikroitk attributes